
Topcoat is a CSS framework that will help you build fast, high-performance UIs. Topcoat is one of the Adobe Open Source initiatives. In terms of philosophy, Topcoat believes that UI performance results in better UX.
Also, the project aims to bring web apps closer to native apps in terms of speed and responsiveness of user-interactions. One of the ways Topcoat achieves performance improvements is by benchmarking how browsers perform when rendering Topcoat components. This is done by measuring load time and frames per second (fps) to find underperforming CSS properties.
Topcoat is still very new. The latest release is version 0.8.0 at the time of writing.
Set Up Topcoat
In this tutorial, we will build a simple user interface with Topcoat.
You can download the source code for this tutorial by clicking the link below: Download Source The first thing you will need to do is download Topcoat’s source code from GitHub. Afterwards, extract the contents of the Zip archive somewhere on your computer. Alternatively you can use your Git command prompt to clone Topcoat’s source code to your computer:
git clone https://github.com/Topcoat/Topcoat.git Here are Topcoat’s top-level directories and files: 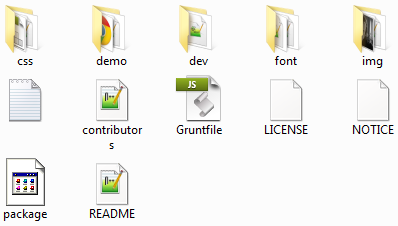 To see the UI components that come with Topcoat, go in the
 demo directory and open index.html in your browser.
You should see a web page that looks like this: 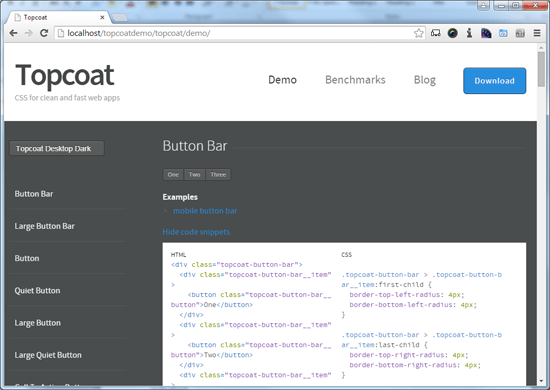
Overview of Topcoat’s Stylesheets
If you look inside Topcoat’s css directory, you will see eight CSS files:
topcoat-desktop-dark.csstopcoat-desktop-dark.min.csstopcoat-desktop-light.csstopcoat-desktop-light.min.csstopcoat-mobile-dark.csstopcoat-mobile-dark.min.csstopcoat-mobile-light.csstopcoat-mobile-light.min.css
The CSS files that have .min in their file names are minified versions, so there are really just four unique stylesheets that come with Topcoat. For example, topcoat-desktop-dark.min.css is identical to topcoat-desktop-dark.css, except the former is smaller in file size. You should only use one or the other.
Wireframing the UI
Let’s start with a quick wireframe of the user interface we will build with Topcoat. Doing this will help us figure out which Topcoat components we will need. Here’s the wireframe:  Looking at the wireframe, we can see that we will need these three Topcoat components:
- Navigation Bar
- List
- Button
Tip: You can use the demo file that we looked at earlier to learn how to implement other Topcoat components.
Create an HTML Document
The next step is to create an HTML document for our UI. Start with some basic HTML markup, making sure to reference one of Topcoat’s stylesheets.
For this example, we will use the topcoat-mobile-light.css stylesheet.
<!DOCTYPE html> <html> <head> <title>Online Banking Interface</title> <link rel="stylesheet" href="topcoat-mobile-light.css"> </head> <body> <!-- Place your content here --> </body> </html>Add the Topcoat Components
Within the <body> element of our HTML document, we will add the Navigation Bar, List and Button components.
<div class="topcoat-navigation-bar"> <div class="topcoat-navigation-bar__item center full"> <h1 class="topcoat-navigation-bar__title">Accounts</h1> </div> </div> <div class="topcoat-list"> <h3 class="topcoat-list__header">Deposits</h3> <ul class="topcoat-list__container"> <li class="topcoat-list__item">Personal Checkings - $12,322.10</li> <li class="topcoat-list__item">Personal Savings - $25,322.10</li> </ul> </div> <div class="topcoat-list"> <h3 class="topcoat-list__header">Loans</h3> <ul class="topcoat-list__container"> <li class="topcoat-list__item">Mortgage - $662,322.10</li> </ul> </div> <div class="topcoat-list"> <h3 class="topcoat-list__header">Investments</h3> <ul class="topcoat-list__container"> <li class="topcoat-list__item">401K Account - $232,322.10</li> </ul> </div> <p><button class="topcoat-button--cta">Sign Out</button></p>Test Your Work
Open your HTML document in a web browser.
You should see something like this: 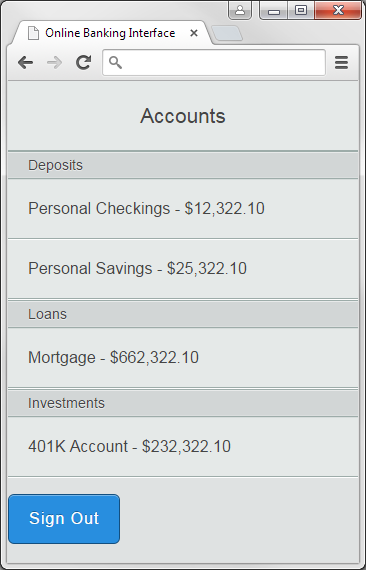 As you can see, it’s quick and easy to create user interfaces with Topcoat.
Improving Performance with Custom Builds
If you are serious about web performance, you can also trim down Topcoat’s CSS by building a custom stylesheet that includes only the Topcoat components you will use in your work. To create a custom Topcoat build, you will need:
- Node
- npm (this comes pre-installed with Node by default)
- Grunt CLI
- Grunt
First, go into your topcoat directory and open the package.json file in a text editor. 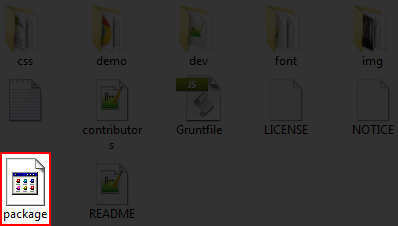 In
In "dependencies", remove the dependencies you don’t intend to use. In our online banking UI example, we only need the following Topcoat dependencies:
"dependencies": { "topcoat-button-base": "~0.6.1", "topcoat-navigation-bar-base": "~0.5.0", "topcoat-navigation-bar": "~0.5.0", "topcoat-list-base": "~0.4.1", "topcoat-list": "~0.5.0", "topcoat-button": "~0.5.4", "topcoat-theme": "~0.6.4", "topcoat-utils": "~0.2.0" } After editing your package.json file, don’t forget to save.
Next open up the Node command prompt. If you don’t have this set up yet, you can read Installing Node.js to learn how to install and configure Node on your computer. By default, Node will automatically install npm.
Using the Node command prompt, navigate to your topcoat directory using the following syntax:
cd path/to/topcoat Important: change path/to/topcoat to the actual location of your topcoat directory on your machine. If you don’t have Grunt CLI installed, install it globally using the following command:
npm install -g grunt-cliNext, install all the required dependencies by issuing the install command with no arguments:
npm installIssuing the command above will automatically install all the npm packages that are required to build our custom Topcoat stylesheets. To build our custom stylesheets, we just need to issue this command:
grunt Now when you go inside Topcoat’s css directory, you will notice that the file sizes of your stylesheets are smaller.
This is because we have removed style rules that we don’t need. In the case of the stylesheet we’re using, topcoat-mobile-light, the file size dropped by -74.4%.
Things to Look Forward to
As stated earlier, Topcoat is still pretty new.
However, the team behind Topcoat has a clear vision of what they must do in order to achieve further performance improvements. To learn more about what’s up ahead in Topcoat’s future and how it plans to address common performance issues in web apps, check out this wiki page over at Topcoat’s GitHub repository.
Related Content
-
 President of WebFX. Bill has over 25 years of experience in the Internet marketing industry specializing in SEO, UX, information architecture, marketing automation and more. William’s background in scientific computing and education from Shippensburg and MIT provided the foundation for MarketingCloudFX and other key research and development projects at WebFX.
 -

WebFX is a full-service marketing agency with 1,100+ client reviews and a 4.9-star rating on Clutch! Find out how our expert team and revenue-accelerating tech can drive results for you! Learn more
Make estimating web design costs easy
Website design costs can be tricky to nail down. Get an instant estimate for a custom web design with our free website design cost calculator!
Try Our Free Web Design Cost Calculator
Share this article


Web Design Calculator
Use our free tool to get a free, instant quote in under 60 seconds.
View Web Design CalculatorMake estimating web design costs easy
Website design costs can be tricky to nail down. Get an instant estimate for a custom web design with our free website design cost calculator!
Try Our Free Web Design Cost Calculator


